How to Make Subtitles for YouTube for Free: A Complete Guide
Unlock the easiest way to make free YouTube subtitles. From transcription to uploading, get a complete workflow without subscriptions and boost viewer engagement.
DeepScribe Team
Content Team
How to Make Subtitles for YouTube for Free: A Complete Guide
In the dynamic world of digital content, subtitles play a pivotal role in ensuring videos reach a broader audience. Did you know that over 85% of viewers engage with videos that include subtitles when in noisy environments? Yet, despite the clear benefits, many creators still rely on YouTube’s auto-captions, which often lack precision. This can significantly hinder viewer engagement. To maximize reach and ensure accessibility, creators need a streamlined, production-quality subtitle workflow that's easy on the wallet.
This guide offers exactly that—a no-subscription, studio-quality subtitle pipeline that’s entirely free. We’ll walk you through the fastest path to accurate and engaging subtitles—from auto-transcription to creating a clean and perfectly timed SRT file ready for YouTube. You’ll also learn exactly where skipping edits can sabotage your video’s accessibility and engagement. Whether you're a solo creator or part of a small team, this workflow will elevate your content, making sure your subtitles click into place seamlessly. Let’s dive in and unlock the potential of free, precise subtitle creation.
Why Subtitles Matter for YouTube Videos
Subtitles are a game-changer for engaging your YouTube audience, especially in our fast-paced world where over 85% of viewers engage more with videos that include subtitles, particularly in noisy environments (Vizard.ai). This powerful statistic highlights how crucial subtitles can be for capturing and retaining viewer attention, regardless of where your audience is tuning in.
Enhancing Accessibility and Engaging a Wider Audience
Improved accessibility is one of the biggest benefits of subtitles, helping you reach a broader audience including the deaf and hard-of-hearing communities. Subtitles allow your content to break language barriers and reach non-native speakers, making it accessible to a global audience. With AI tools like DeepScribe, you can provide subtitles in over 100 languages, personalizing reach further by accommodating various dialects and accents.
Elevating Viewer Retention and Experience
Subtitles also play a significant role in boosting viewer retention. When people can understand and follow your content more easily, they’re likely to watch longer and engage more deeply. This helps reduce bounce rates and boosts watch time, signaling to YouTube’s algorithm that your content is valuable and worth promoting. As an additional perk, subtitles enhance comprehension, allowing viewers to catch details they might have missed due to accents or background noise.
Clarity in Noisy Environments
Subtitles excel in environments where audio clarity is compromised. Imagine viewers in bustling coffee shops or using public transport; subtitles ensure your message isn’t lost in the noise. This adaptability is crucial in retaining viewers who might otherwise tune out because they can't hear clearly.
Incorporating subtitles is a smart strategy for any creator who values accessibility and engagement. With tools like DeepScribe, which offer studio-quality transcription and subtitle generation, doing this efficiently and effectively is more accessible than ever. Subtitles don’t just complement your content; they elevate it, transforming videos from a singular sensory experience into a multidimensional one. By adopting robust subtitle practices, you're investing in a more inclusive and engaging viewer experience.
Understanding Captions vs. Subtitles: SRT vs. VTT
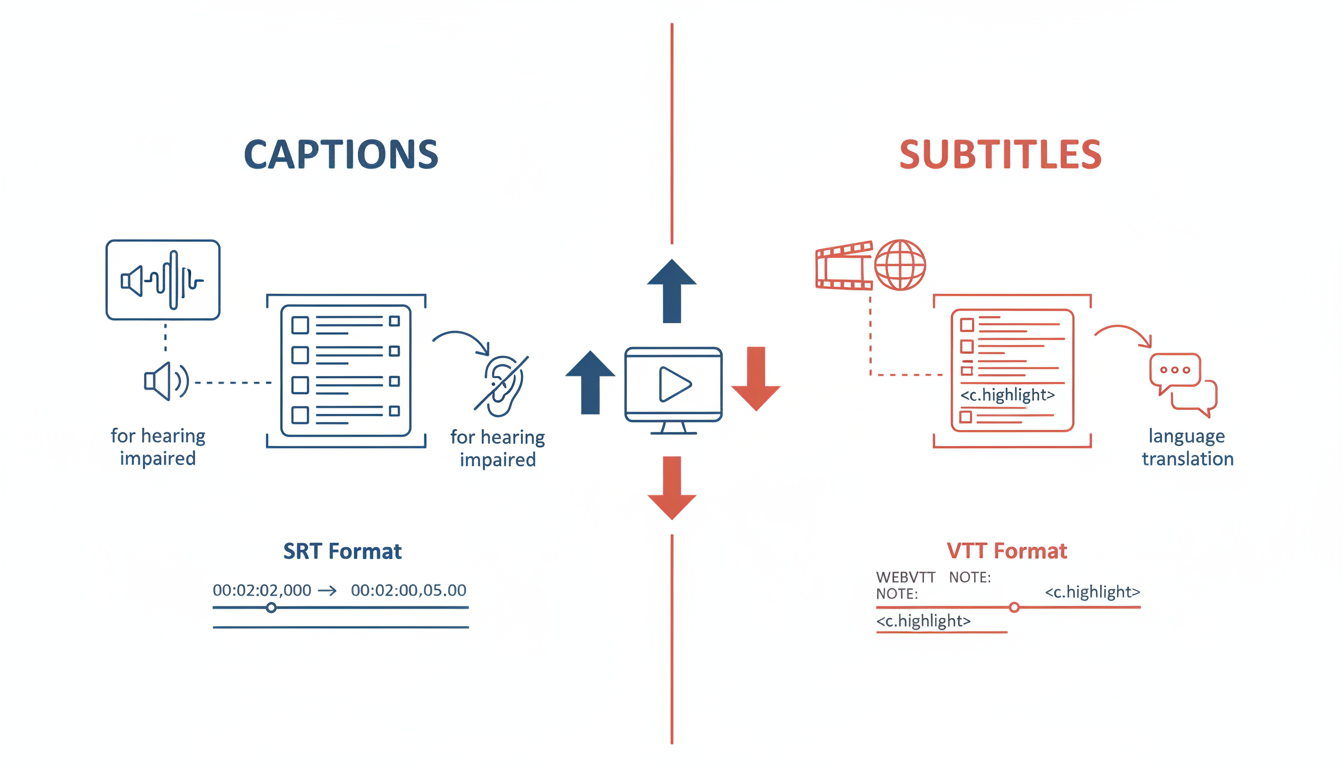
When diving into the world of video production, understanding the difference between captions and subtitles is crucial for creating effective YouTube content. Although often used interchangeably, they serve distinct purposes in enhancing viewer engagement and accessibility.
Captions are designed primarily with accessibility in mind. They include both the spoken dialogue and essential non-speech elements like sound effects and speaker changes, making the content accessible to viewers with hearing impairments. Subtitles, on the other hand, are typically used for translating dialogue for viewers who understand a different language. They generally exclude non-verbal audio cues.
Why SRT Is Sufficient for YouTube
When preparing your YouTube videos, the SRT (SubRip Subtitle) format is often the go-to choice. It is a widely-accepted and easy-to-use format that captures text and timing information, ensuring your captions are synchronized with your video content. YouTube's simplicity in handling SRT files allows for a seamless upload process, making it easier for creators to enhance their videos without extensive technical know-how.
Here's a quick example of what an SRT entry might look like:
1
00:00:01,000 --> 00:00:03,000
Welcome to our video on creating captions!
When VTT Might Be Preferred
While SRT files meet the needs for most YouTube creators, there are scenarios where VTT (WebVTT) might be preferred. VTT supports additional styling features and metadata, making it ideal for integrating more detailed and expressive subtitles. This becomes particularly useful if you need to synchronize complex animations or style your text with custom fonts and colors. However, these features aren't just for visual flair—they can be vital for maintaining accessibility standards, especially when captions are a critical part of user experience on your platform.
"Using high-contrast colors and semi-transparent backgrounds is essential for making subtitles accessible," notes an expert in readability.
For many creators, sticking to SRT is enough for YouTube. But if you aim to expand your video content across other platforms or require intricate styling, understanding the advantages of VTT becomes valuable. Whether you’re using SRT or VTT, it's important to ensure your captions are not just reflective of your spoken content but also finely-tuned for timing and readability. This alignment aids in keeping your viewers engaged and your content accessible, reinforcing the importance of investing time in your subtitle strategy.
Step-by-Step: How to Make Subtitles for YouTube Free
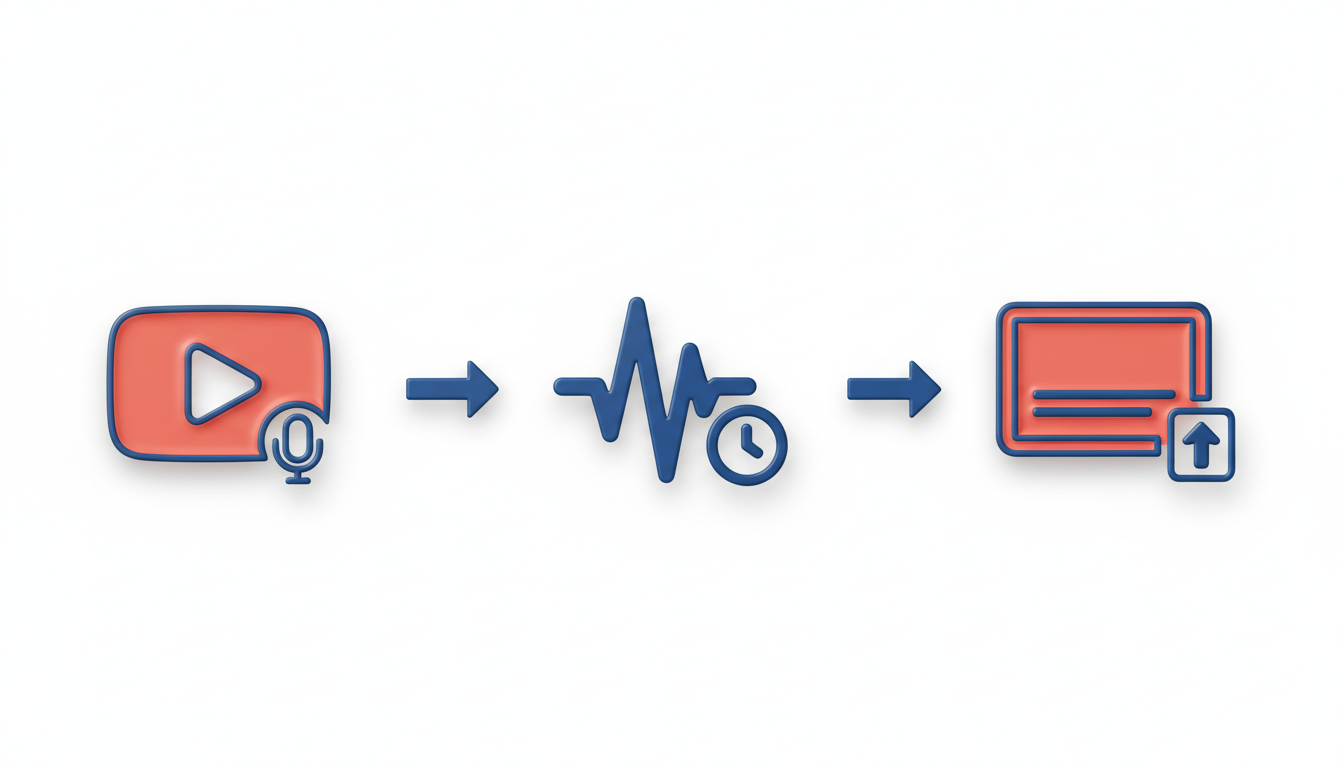
Creating high-quality subtitles for your YouTube videos doesn't have to be a costly or complex process. With the right tools and a clear workflow, you can generate subtitles that enhance accessibility and viewer engagement—all for free. Let's walk through each step of the process.
1. Transcribe Your Video for Free
Before diving into editing and timing, start by transcribing your video. This is where free tools like DeepScribe really shine. DeepScribe uses AI to provide highly accurate audio-to-text transcription in minutes. If you're just starting out, their free plan allows you to transcribe up to 30 minutes per month, making it a perfect match for occasional creators. With support for multiple audio formats and Whisper-powered accuracy, DeepScribe ensures that even tricky audio—filled with accents or background noise—is handled effectively.
For additional free options, you might consider Maestra which offers unlimited subtitle generation without an account, or Videofa.st for up to 3 videos per month with a 45-second processing time. However, keep in mind the constraints like limited monthly uploads when using these platforms.
Here’s a quick comparison:
DeepScribe: 30 minutes/month, supports multiple audio formats, Whisper-powered accuracy.
Maestra: Unlimited for 125+ languages, no account needed.
Videofa.st: 3 videos/month, fast processing at 45 seconds.
Pro Tip: Always save your transcription as a text file first to prevent data loss during the editing process.
2. Edit for Accuracy and Readability
Once you have your transcript, editing is crucial. DeepScribe not only provides a text transcript but also allows you to highlight and annotate directly within the interface—perfect for making quick corrections and noting speaker changes.
Key areas for edits include:
Accuracy: Ensure names, technical terms, and any non-standard words are correct.
Speaker Labels: Clearly label speakers to maintain context, especially in interviews or multi-speaker videos.
Readability: Keep sentences short and split long lines where necessary. Avoid dense blocks of text to improve audience engagement.
Expert Insight: "Relying solely on auto-captions without edits can significantly hurt viewer engagement." Ensure your subs are tailored for clarity.
3. Timing is Everything
Next, synchronize your transcript with your video. This step ensures that your subtitles appear at the right time. Tools like Subtitle Edit, an open-source offline editor, are perfect for this task. They offer detailed control over timing and can work without an internet connection.
Here's how you can adjust timing effectively:
Play the video segment and align the start and end times of your captions until they match the spoken dialogue precisely.
Ensure that subtitles do not linger on the screen too long—this can distract the viewer.
Common Mistake: Overlapping subtitles can lead to confusion. Use clear break points to separate speech.
4. Export SRT and Upload to YouTube
Now that you have a clean and timed subtitle file, it's time to export. SRT is the most widely used format for YouTube, offering compatibility and ease of upload.
Exporting: Ensure your subtitle editor exports in the SRT format. Tools like DeepScribe offer a straightforward export function to SRT, and if you upgrade, additional formats like VTT are available.
Uploading to YouTube: Navigate to YouTube Studio, select the video, and use the Subtitles section to upload your SRT file. YouTube allows you to review and make any final adjustments in their editor.
Export Gotcha: Double-check time codes after export—sometimes tiny misalignments occur that are easily fixed directly in YouTube Studio.
5. Quality Assurance: Final Checks
Before hitting publish, run a final QA check:
Watch the entire video with subtitles to catch any missed errors.
Pay attention to the flow and readability on different devices.
Confirm that speakers are correctly labeled and that subtitle display times sync with the audio precisely.
By following this structured and free workflow with tools like DeepScribe, you ensure your YouTube subtitles enhance accessibility and engagement. This not only helps capture diverse audiences but also improves your video's overall impact.
Free Tools for Transcription and Editing
Creating subtitles for YouTube videos doesn't have to break the bank. There are several free tools available that can help you transcribe and edit subtitles with ease. These tools offer powerful features, often with no obligations or hidden fees. Let’s dive into some of the best options.
Maestra
Key Insight: Unlimited subtitle generation in 125+ languages without an account.
Maestra ([Maestra product screenshot]
Key Insight: Unlimited subtitle generation in 125+ languages without an account.
Maestra
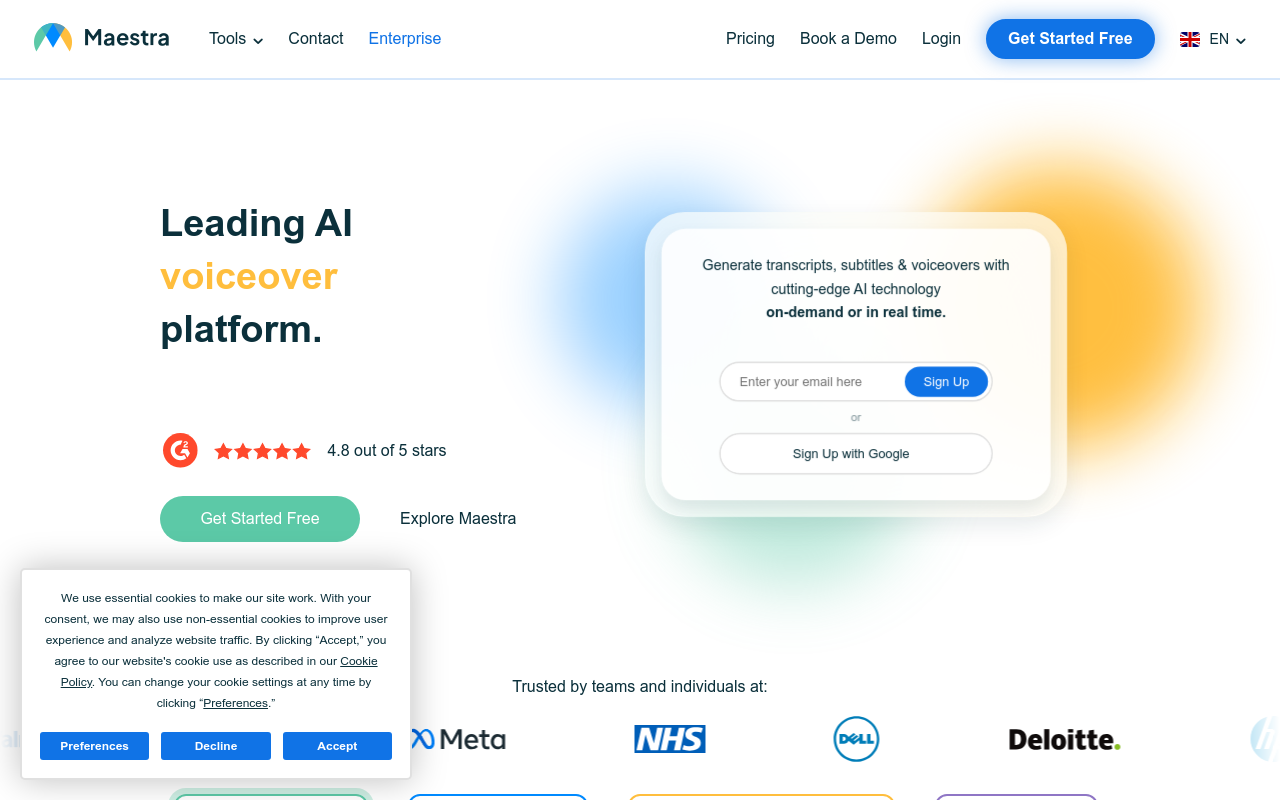
stands out as a versatile option for content creators. This platform allows unlimited free subtitle generation across 125+ languages, all without the need for an account. Such broad linguistic coverage makes it perfect for creators with diverse audiences. For instance, if you're working on videos in multiple languages or dealing with a variety of dialects, Maestra can significantly ease your workflow. By eliminating the account barrier, it streamlines the process, saving you precious time. stands out as a versatile option for content creators. This platform allows unlimited free subtitle generation across 125+ languages, all without the need for an account. Such broad linguistic coverage makes it perfect for creators with diverse audiences. For instance, if you're working on videos in multiple languages or dealing with a variety of dialects, Maestra can significantly ease your workflow. By eliminating the account barrier, it streamlines the process, saving you precious time.
Videofa.st
Key Insight: Processes three videos per month for free.
If you’re looking for quick and efficient subtitle processing, Videofa.st ([Videofa.st product screenshot]
Key Insight: Processes three videos per month for free.
If you’re looking for quick and efficient subtitle processing, Videofa.st
is another notable option. It offers a free tier that processes up to three videos monthly, with a remarkably fast processing time of about 45 seconds per video. This tool is perfect for creators who don’t produce a high volume of content each month but still require rapid subtitle generation. However, for more frequent uploads, you might hit a bottleneck, so it’s essential to plan your uploads accordingly. is another notable option. It offers a free tier that processes up to three videos monthly, with a remarkably fast processing time of about 45 seconds per video. This tool is perfect for creators who don’t produce a high volume of content each month but still require rapid subtitle generation. However, for more frequent uploads, you might hit a bottleneck, so it’s essential to plan your uploads accordingly.
Subtitle Edit
Key Insight: Open-source and available for offline use.
Subtitle Edit is a powerful tool for those who prefer offline solutions. This open-source application is perfect for video editors who work in environments with unreliable internet access or privacy concerns that restrict online tools. Subtitle Edit supports a plethora of file formats and offers robust editing capabilities. It’s particularly adept at refining auto-generated captions, ensuring better accuracy in speaker labels, timing, and readability.
Comparison Table
Below is a comparison of these tools based on key features:
Tool | Languages Supported | Free Tier Limitations | Offline Use | Key Features |
|---|---|---|---|---|
Maestra | 125+ | Unlimited use, no account required | No | No-account subtitle generation |
Videofa.st | Single | 3 videos/month | No | Quick processing, limited free tier |
Subtitle Edit | Many | None | Yes | Extensive format support, offline editing |
Key Takeaway: "Relying solely on auto-captions without edits can significantly hurt viewer engagement." Expert editing ensures subtitles enhance accessibility and engagement, turning passively consumed content into interaction-rich viewing experiences.
By utilizing these free tools, you can construct a reliable pipeline that covers everything from transcription to final subtitle export. Whether you need the broad language support of Maestra, the quick processing of Videofa.st, or the flexibility of Subtitle Edit, there's a tool tailored to your workflow. For those ready to scale beyond the constraints of free tools, considering an upgrade to services like DeepScribe could further streamline the process, providing even more professional-grade results.
Editing Subtitles for Accuracy and Readability
Editing auto-generated captions is crucial for maintaining high engagement on your YouTube videos. While auto-captions provide a quick start, their initial accuracy often falls short, especially with names, jargon, and accents.
Why Edit? Unedited captions can significantly harm viewer engagement. Over 85% of viewers engage more with videos that have accurate captions, especially in noisy environments (Vizard.ai). Moreover, relying solely on these auto-generated texts can lead to a disjointed viewing experience, leaving viewers frustrated and disconnected from your content.
Editing Checklist To ensure your subtitles enhance accessibility and engagement, consider this checklist:
Speaker Labels: Clearly indicate different speakers to avoid confusion. This is vital for interviews and multi-speaker dialogues. Tools like DeepScribe perform well here, identifying and labeling speakers with impressive accuracy.
Line Breaks and Timing: Ensure that lines are neither too long nor too short, and that they're timed naturally with speech. Ideally, lines should not exceed 42 characters to maintain readability. Clunky breaks can distract viewers, covering up important visuals and interrupting the visual flow.
Subtitle Readability: Focus on readability by using high-contrast colors and semi-transparent backgrounds, which experts state are essential for making subtitles accessible. This helps cater to viewers who rely on captions, such as those who are deaf or hard of hearing.
“Relying solely on auto-captions without edits can significantly hurt viewer engagement” — Expert guidance on subtitle accessibility.
Key Points on Format Deciding on the right file format is crucial. For YouTube, SRT is often sufficient, but formats like VTT could be needed for more advanced styling options. Understanding these differences will streamline your workflow and ensure compatibility.
Accuracy Matters Some tools claim high accuracy, like LiveLink.ai's 99.9%. While impressive, it's crucial not to skip editing entirely, as even minor errors can compromise viewer experience. For creators looking to step up their game without a subscription, solutions like Maestra.ai offer free subtitle generation and support over 125 languages without needing an account.
By integrating these practices into your workflow, you’ll significantly improve the viewing experience on your channel. For more detailed advice on transcription, check out the DeepScribe Blog on Audio Transcription Tips to optimize your subtitle creation process.
Exporting and Uploading Captions
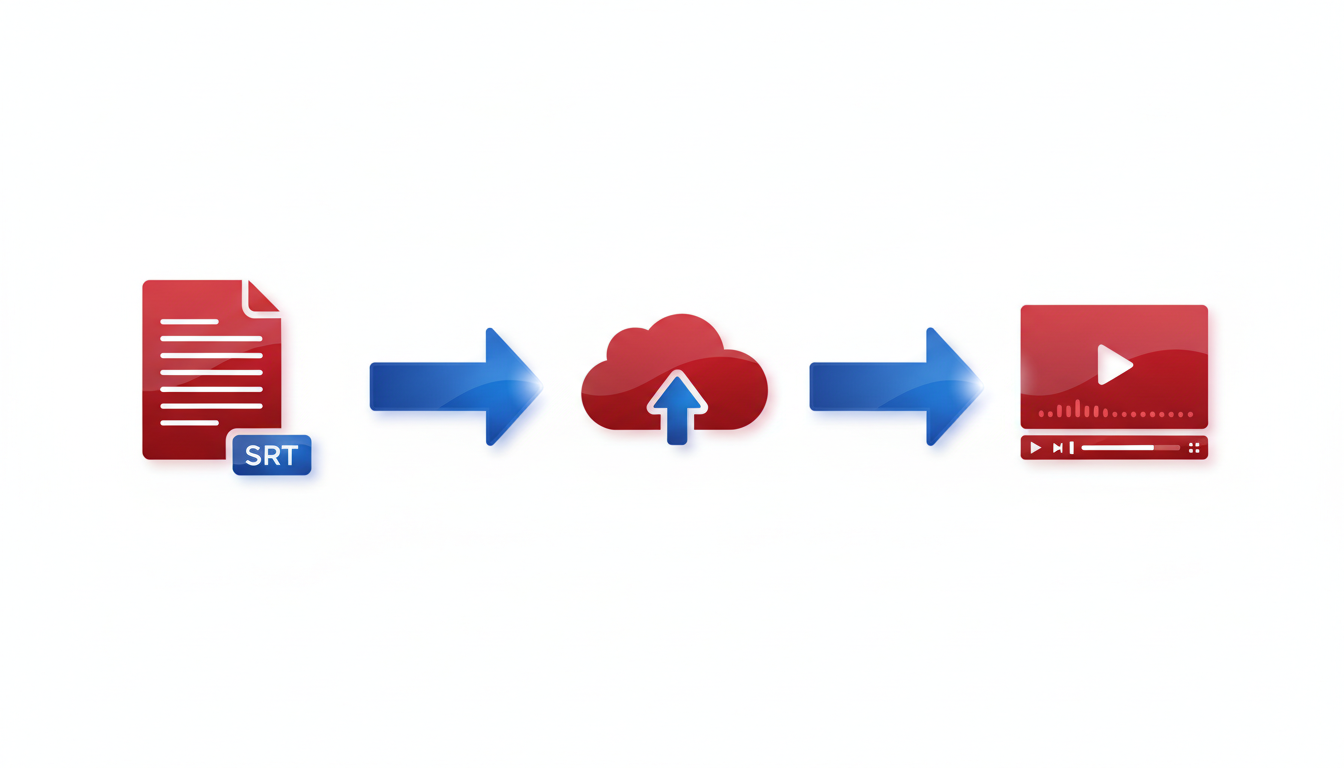
When it comes to exporting subtitles, understanding the difference between SRT and VTT files is crucial. The SRT format is widely used for its simplicity and compatibility. It organizes dialogue into numbered lines with timestamps, making it easy for tools and platforms to read. On the other hand, the VTT format allows for more styling options, such as changing text color or font, which can be useful for accessibility or visual emphasis.
For YouTube, SRT files are typically sufficient. They ensure your captions are synced correctly with your video's audio. DeepScribe supports exporting in both SRT and VTT formats, providing flexibility depending on your needs.
How to Upload SRT to YouTube
Uploading an SRT file to YouTube is straightforward:
Log in to YouTube Studio and select your video.
Navigate to the Subtitles section from the left panel.
Click on ADD and select your language.
Choose Upload file and select With timing.
Select your SRT file and click Open.
This process ensures your captions appear accurately, improving both accessibility and engagement. Remember that over 85% of viewers engage better with subtitles in noisy environments, according to Vizard.ai.
Common Errors and Fixes
While uploading, you might encounter some common errors:
Incorrect Formatting: Ensure your SRT complies with the standard format — timestamps must be accurate and lines should be limited to a readable length.
Language Mismatch: Ensure the language setting in YouTube matches the language of your SRT. Mismatches can lead to failed uploads.
Timing Issues: If captions appear too early or late, adjust them in a subtitle editor like Subtitle Edit. This tool allows you to fine-tune timings without internet access.
By addressing these errors promptly, you maintain a seamless viewing experience. As an essential part of your YouTube workflow, such attention to detail can significantly enhance viewer retention and accessibility.
For a more comprehensive subtitle management experience, consider DeepScribe's capabilities for transcribing and exporting in various formats, ensuring your media is always accessible and professional.
Troubleshooting Common Subtitle Issues
Creating subtitles for your YouTube videos doesn’t have to be a headache, but common issues like timing mishaps and speaker label inaccuracies can trip up even the savviest content creators. Let’s dive into some troubleshooting tips.
Fixing Timing Issues and Overlaps
Key Insight: Proper timing is crucial for subtitle coherence. Mismatched timing can lead to viewer confusion and engagement loss.
Check Subtitle Length: Subtitles that are too long can overlap with the next line. Aim for a maximum of two lines per subtitle, each with no more than 42 characters.
Adjust Timing with Tools: Use subtitle editing tools like Subtitle Edit to align subtitles precisely with your video. This open-source tool allows for frame-by-frame adjustments, ensuring subtitles appear and disappear at exactly the right moment.
Test in Noisy Environments: Remember, 85% of viewers engage more with videos that have subtitles (Vizard.ai). Play your video in a variety of conditions to ensure timing works even when viewers might be distracted.
Resolving Speaker Label Inaccuracies
Key Insight: Accurate speaker labels enhance understanding, especially in multi-speaker dialogues.
Automate with Accuracy: Tools like DeepScribe automatically detect and label speakers accurately using advanced AI, which is crucial for interviews or podcast formats.
Manual Adjustments: If labels aren’t perfect, go through the transcript to manually adjust them. Most subtitle editors allow you to edit .SRT files directly where you can correct misattributions.
Use Clear Names: Instead of generic labels like "Speaker 1", use names or roles (e.g., "Host," "Guest") to improve clarity.
Dealing with Long Line Lengths
Key Insight: Subtitles should be concise to ensure readability and prevent screen clutter.
Maintain Readability: Stick to the guideline of 32-42 characters per line, and ensure lines are split naturally at points where a viewer might pause if reading aloud.
Break Up Complex Sentences: If a line is too long, break it into shorter, simpler lines. This not only fits into the screen better but also aids viewer comprehension.
Accessibility Tip: Implement best practices like high-contrast colors and semi-transparent backgrounds to make your subtitles easily readable for all viewers, ensuring inclusivity.
By applying these troubleshooting strategies, you can greatly enhance the quality and effectiveness of your YouTube subtitles, leading to better user engagement and accessibility. Remember, tools like DeepScribe can streamline this process significantly, offering solutions for timing, speaker labels, and file exports to make your workflow seamless and efficient.
Best Practices for Accessible Subtitles
Creating accessible subtitles is essential for engaging your entire audience, ensuring that everyone, including those with hearing impairments, can enjoy your content. Here are critical best practices to follow:
1. High-Contrast Colors and Semi-Transparent Backgrounds
Start with the visual clarity of your subtitles. Using high-contrast colors like white or yellow text with a dark background enhances readability, especially for viewers watching on smaller screens or in well-lit environments. A semi-transparent background helps prevent subtitles from blending into the video, providing a cleaner view without obscuring important visuals.
Expert Insight: “Using high-contrast colors and semi-transparent backgrounds is essential for making subtitles accessible.”
2. Optimal Line Length and Pacing
Subtitles should be concise. Aim for no more than 32 characters per line and keep subtitles to one or two lines to avoid covering too much of the screen. This format is not only visually appealing but also helps synchronize the text with speech, improving comprehension.
Line Examples:
“Welcome to the channel” (acceptable)
“Today, we will explore the exciting world of…” (too long)
Maintain a pacing that allows viewers enough time to read the entire subtitle without rushing. Typically, a subtitle should remain on screen for around 2-3 seconds or longer for complex dialogue.
3. Avoid Burned-In Captions
Burned-in captions are embedded directly into the video and can’t be toggled off. While they may seem convenient, they limit accessibility improvements such as color, size adjustments, and pose issues for viewers who don’t need captions. Instead, opt for closed captions, which offer flexibility and a more inclusive viewing experience.
Technical Note: Formats like SRT and VTT support closed captions effectively and are preferred for their interactivity and customization capabilities.
Engagement Tip: “Relying solely on auto-captions without edits can significantly hurt viewer engagement.”
By paying attention to these best practices, you’ll enhance your video's accessibility and overall viewer satisfaction. For a seamless workflow that includes generating and exporting SRT/VTT files, consider tools like DeepScribe, especially as your needs grow.
Scaling Your Subtitle Workflow with DeepScribe
When your YouTube channel starts growing and needs begin to exceed what free tools can offer, considering a robust solution like DeepScribe is a smart move. Unlike many free options that involve compromise, DeepScribe offers a seamless transition to a more professional subtitle workflow while maintaining accessibility and engagement.
When to Consider Upgrading
The charm of free tools is undeniable, but limitations can soon become bottlenecks as you scale. Free services typically cap the number of videos you can process or restrict languages and formats, like the 3-videos-per-month limit at Videofa.st. When these constraints impact your content calendar or undermine viewer engagement due to less-than-perfect accuracy, it's time to explore premium alternatives. DeepScribe offers superior transcription capabilities with Whisper-powered accuracy, boasting an impressive 99% precision. This is particularly beneficial for multilingual videos or content with technical jargon where high accuracy is critical.
DeepScribe's Export and Integration Capabilities
DeepScribe shines when it comes to export and integration. While free tools may only offer basic SRT files, DeepScribe supports multiple formats, including VTT, which is especially useful for dynamic subtitle styling. Pro and Business plans also unlock real-time integration with platforms like Zoom and Microsoft Teams for live transcription feeds, extending your reach beyond pre-recorded content. This versatility ensures your subtitles meet diverse distribution and accessibility needs without extra hassle.
Advantages of Paying for VTT Capabilities
While SRT files are typically sufficient for YouTube, exploring VTT options can bring your subtitling up a notch. VTT supports rich text content, allowing for color customization, placement, and even interactive transcripts, which enhance readability and user engagement. By opting for DeepScribe's Pro or Business plans, creators gain the power to produce these enriched subtitles, enhancing the viewing experience significantly. Plus, with VTT’s capability for incremental updates, keeping your captions aligned with video edits becomes smoother, further improving the overall workflow.
By investing in DeepScribe, you not only upgrade your subtitle quality but also integrate a streamlined process that saves time and boosts productivity—an essential move for a growing channel. For more on how DeepScribe can transform your subtitle production, explore DeepScribe's features to see how its tools can fit into your workflow effectively.
Frequently Asked Questions
What is the difference between captions and subtitles?
Captions include dialogue and speaker labels within the video language, while subtitles may include translations.
Why should I edit auto-generated captions?
Editing improves accuracy, timing, and viewer engagement, addressing issues missed by auto-generators.
What tools can I use to generate free subtitles?
Maestra and Videofa.st offer free transcription services. Subtitle Edit is a great offline editor.
What file format is best for YouTube captions?
SRT is commonly used for YouTube, but VTT may be preferable for extended formats.
How do I fix common subtitle timing issues?
Use editing tools to adjust timing, ensuring captions appear in sync with dialogue.
Conclusion
Creating quality YouTube subtitles doesn't have to break the bank. Here's a quick recap of the essentials:
Choose a free transcription path that suits your needs.
Always edit the auto-generated transcripts for accuracy.
Time and export the subtitles in SRT format.
Upload and perform QA in YouTube Studio to ensure everything looks perfect.
For those looking to streamline their workflow, consider trying DeepScribe. It offers a straightforward SRT export capability and additional features like VTT exports on higher tiers, providing faster turnaround and reliable, studio-quality captions. If you’re curious about maximizing your content accessibility, check out our internal post on best practices for YouTube captioning. Dive in and elevate your content’s reach!
Written by

DeepScribe Team
Content Team
The DeepScribe content team shares insights on audio transcription and AI technology.