How to Transcribe Video for Free (Step-by-Step)
Discover a complete workflow for transcribing video to text for free using DeepScribe. Ideal for content creators looking to optimize their process.
DeepScribe Team
Content Team
How to Transcribe Video for Free (Step-by-Step)
Navigating the maze of video transcription can be daunting, especially if you're looking for a cost-effective, efficient, and foolproof solution. Most guides stop at converting spoken words into text, leaving creators with messy outputs and incomplete solutions. Enter DeepScribe: a comprehensive, straightforward workflow designed for creators, editors, and teams. In this post, you’ll learn how to leverage DeepScribe’s free transcription capabilities—not only to convert videos to text but also to streamline editing and collaboration with timestamps and clean exports. From the simplicity of uploading your video file to choosing the perfect format for your needs, this step-by-step guide will demystify the transcription process and help you navigate the practical constraints of free plans like file size and minute limits. Let’s delve into a seamless transcription journey where video effortlessly transforms into actionable, organized text.
What You Need Before You Start
Before diving into video transcription for free, it's crucial to prep a few essentials to ensure a smooth experience. First, understand the types of files you'll be working with. Most commonly, you'll encounter MP4, MP3, WAV, and WEBM formats. DeepScribe handles these efficiently, allowing you to extract audio from video formats like MP4 and WEBM seamlessly. This flexibility means you won't need to convert files ahead of time, saving you a step.
Next, consider the length of your video. With DeepScribe’s Free plan, you're limited to 30 minutes of transcription per month and a maximum file size of 25 MB. This is perfect for shorter clips or a few important segments from longer videos. If your video exceeds these limits, you might need to edit it down into smaller chunks or explore paid plans that offer extended capabilities.
It’s also essential to clarify what you want from the transcription. Are you looking to create captions or subtitles, edit a script, or produce documentation? This goal will guide how you interact with the transcript later, especially when choosing the right export format. The Free plan exports to TXT while SRT and VTT for subtitles are supported in Pro/Business plans. Aligning these outcomes with your transcription setup ensures you aren’t left scrambling for solutions mid-project.
Having these considerations at the forefront sets you up for success, allowing DeepScribe’s powerful Whisper-powered transcription to do the heavy lifting while you focus on crafting compelling content from your newly-minted text. Ready to start? Make sure you have an account with DeepScribe—which, by the way, only takes a minute without a credit card requirement.
The Fastest Way to Transcribe Video for Free
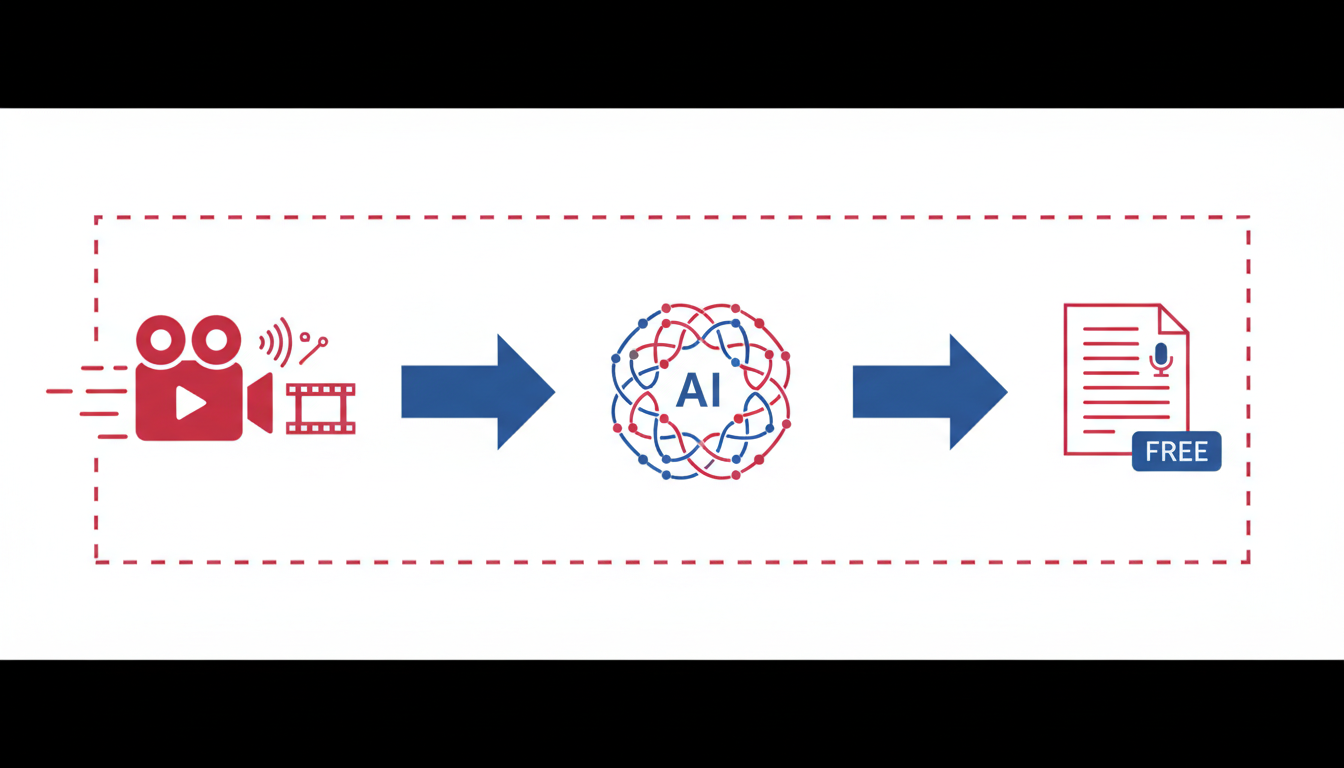
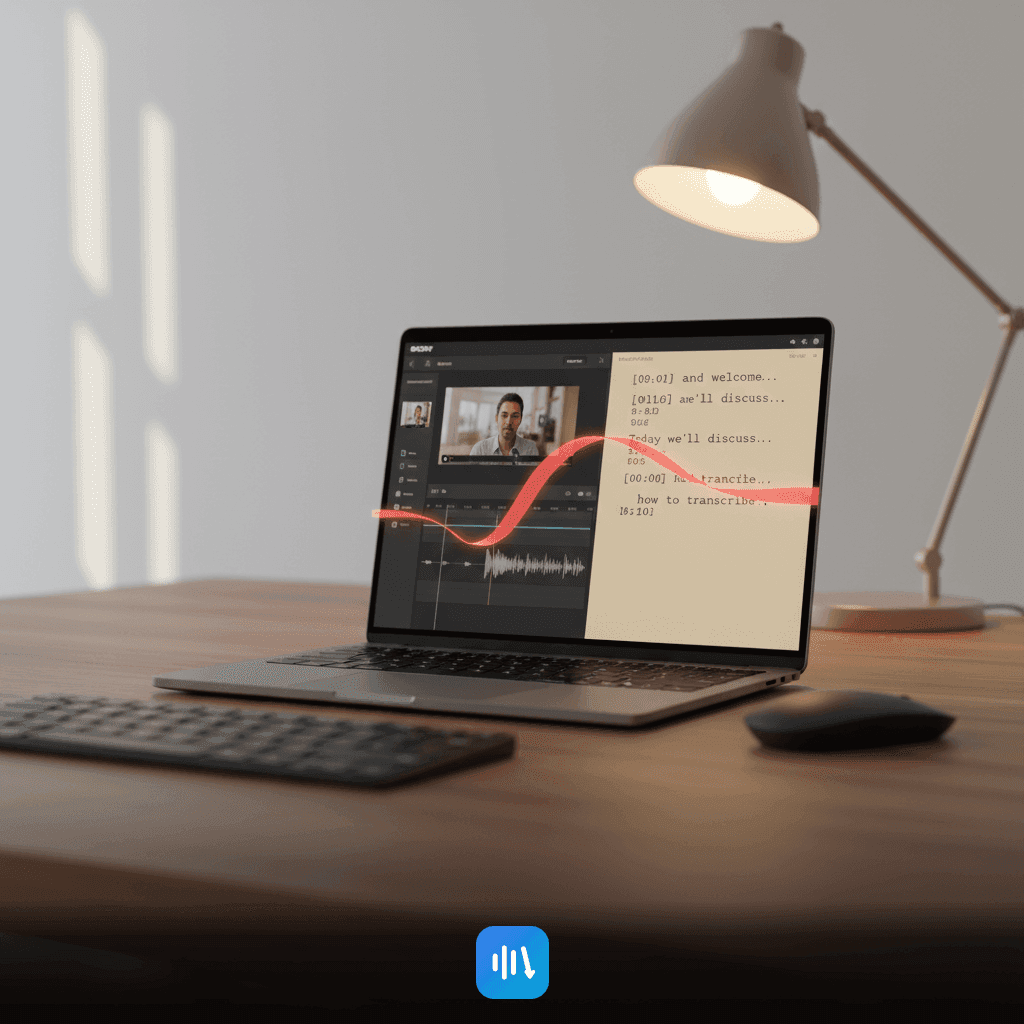
If you've ever found yourself tangled up in the complexities of transcription, DeepScribe offers a seamless, straightforward solution that can save both time and hassle. With its upload-first workflow, DeepScribe transforms how you approach video transcription—it's as easy as Upload → Transcribe → Export.
Here’s the breakdown: You start by uploading your video file directly into DeepScribe. This is where the magic begins. DeepScribe supports a range of formats, including MP4 and WEBM, making it versatile and user-friendly. Once uploaded, DeepScribe’s AI, powered by Whisper, does the heavy lifting. It turns your audio into text with impressive efficiency, boasting a 99% accuracy rate even amidst accents and background noise. This automatic transcription for video means you can finally say goodbye to manual note-taking.
But why choose DeepScribe among other AI video transcription tools? Speed is a major factor. The platform's parallel processing can handle up to 10 hours of audio simultaneously, giving you transcriptions in minutes rather than hours. This sets it apart, especially for solo creators or teams who need quick turnarounds.
Accuracy is another strong suit. Thanks to Whisper's AI, DeepScribe captures the nuances of language, ensuring your transcript is reliable. This makes it ideal for not just creators, but also editors and marketing teams needing precise captions and documentation.
Finally, exporting your transcript couldn’t be easier. Whether it's a basic text file or more complex formats like VTT for captions, DeepScribe caters to various downstream needs.
With DeepScribe, transcribing video is not just about conversion; it's about creating a smooth chain of workflow that enhances productivity and precision, all without a cost barrier.
Step-by-Step: Transcribe a Video for Free with DeepScribe
Let's dive into the practical steps for transcribing a video using DeepScribe—a reliable, free video to text tool that offers an efficient workflow. Whether you’re a solo creator or part of a small marketing team, this guide will help you transform your video content into a precise transcript in just a few simple steps.
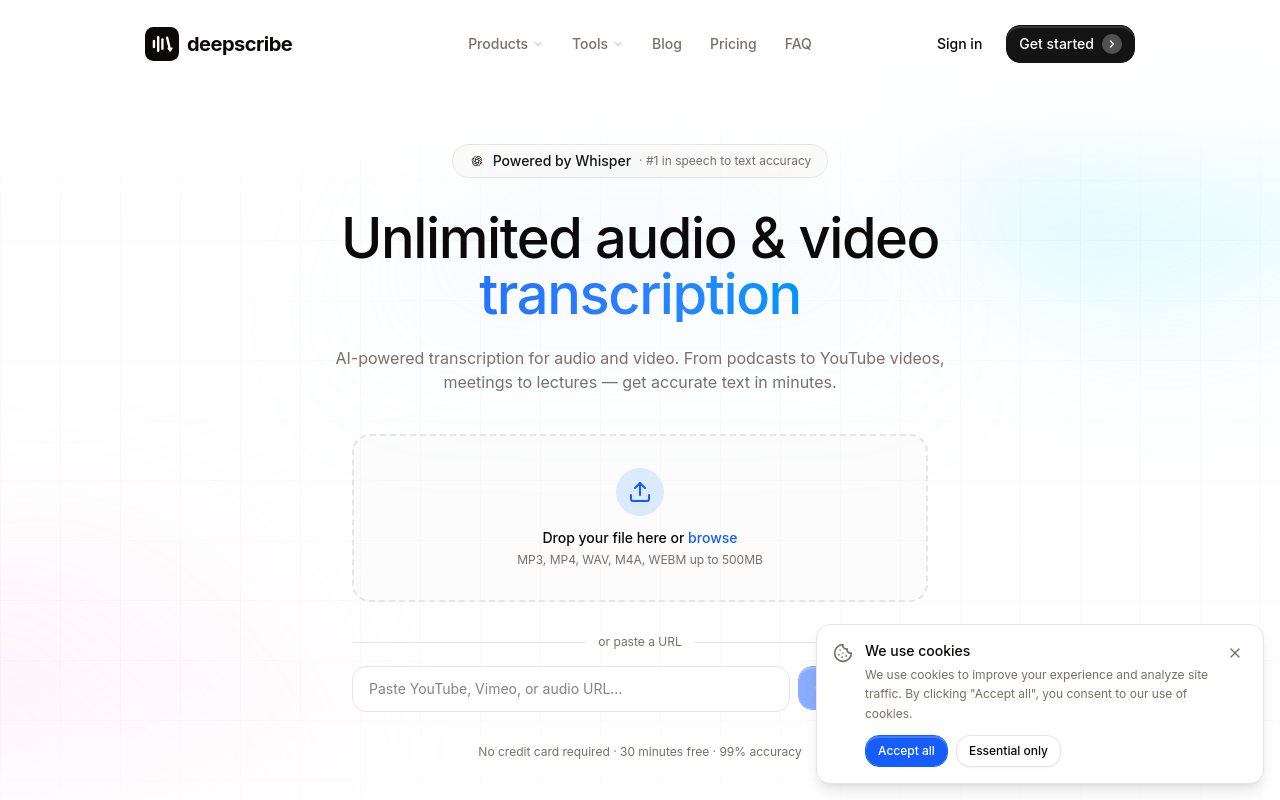
1. Create a Free Account
First things first, you need to set up a free account on DeepScribe. The good news? No credit card is required. Simply head over to the DeepScribe website, click on the "Sign Up" button, and provide your basic details. You’re ready to start transcribing with zero financial commitment.
Key takeaway: Free plans offer 30 minutes of transcription per month and support files up to 25 MB. This covers short projects and episodic content perfectly.
2. Upload Your Video
Now, let's get down to uploading your video. DeepScribe supports common formats like MP4, MOV, and WEBM, among others, ensuring flexibility in the kinds of files you can work with.
- Upload Instructions:
- Navigate to the dashboard after logging in.
- Choose "Upload File" and select your video.
- Ensure your file is within the 25 MB limit for the free tier.
While uploading, note that DeepScribe utilizes AI-driven processing to ensure accuracy—thanks to its Whisper-powered capabilities.
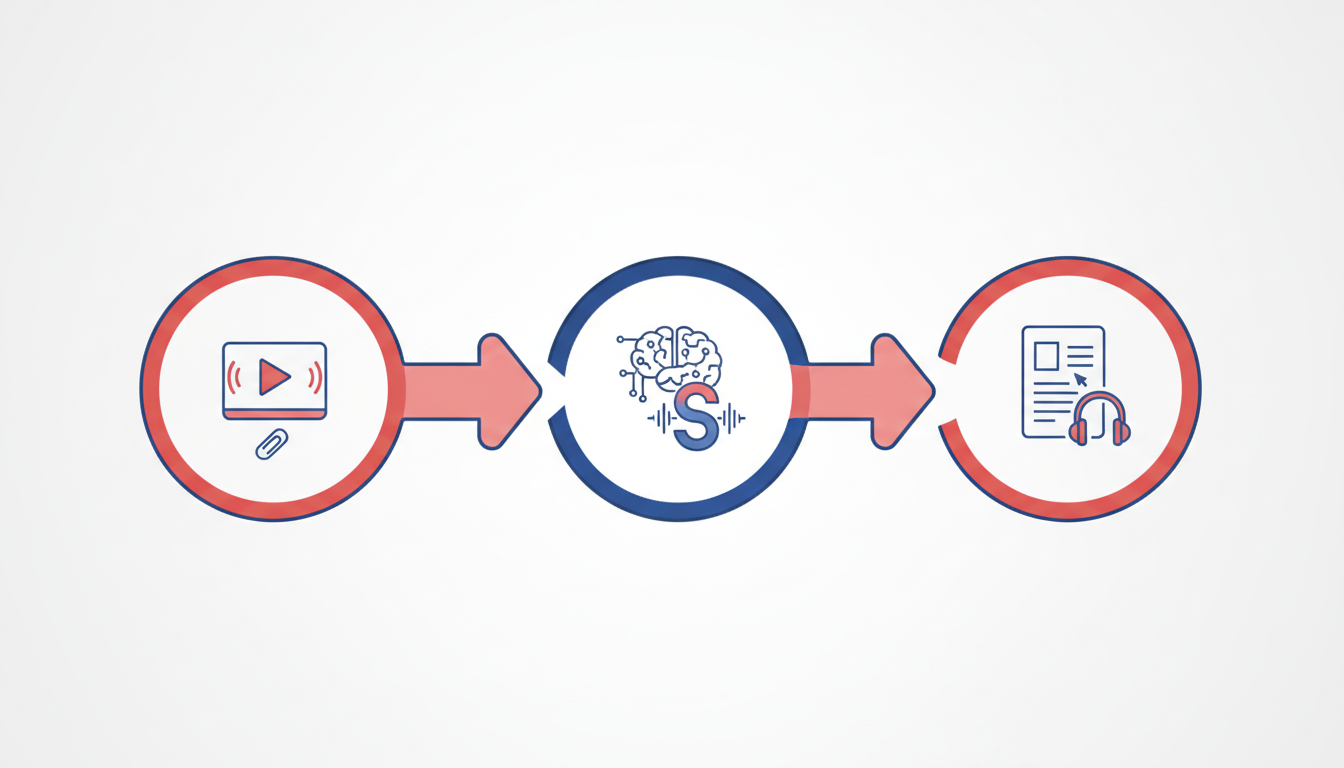
3. Generate the Transcript and Speaker Labels
After uploading, DeepScribe works its magic to generate a transcript. The platform identifies different speakers, automatically generating speaker labels. This is a game-changer for interviews or multi-speaker videos where attributing dialogue is essential.
Key insight: With automatic speaker detection, organizing your content by who said what becomes a breeze.
4. Review and Quickly Fix Key Transcript Areas
Once your transcription is ready, it's time for a quick review. Look out for any key areas that need tweaks, especially if your content includes technical jargon or unique names.
- Editing Tips:
- Skim through the transcript and fix improper nouns or jargon.
- Use the search function to quickly navigate to specific words or phrases.
- Ensure speaker labels are correct for clarity.
DeepScribe’s user-friendly interface allows you to make these edits swiftly, so you don’t end up in a time sink.
Pro Tip: Regularly save your work to avoid losing changes as you make edits.
By following these steps, you harness DeepScribe’s full potential without straying into paid plans unless your workloads expand. This process ensures you maximize the platform’s capabilities within budget constraints, making it an excellent fit for creators who need fast, efficient transcription services.
How to Get Timestamps (and When You Actually Need Them)
Timestamps are more than just a convenience—they're essential for efficient video editing, accessibility compliance, and precise navigation within transcripts. If you've ever struggled to locate specific moments in a recording, you know how invaluable they can be. Whether you're creating subtitles, extracting quotes, or aligning audio with video clips, timestamps ensure everything operates smoothly.
DeepScribe handles timestamp generation seamlessly within its transcription workflow. When you upload your video, DeepScribe automatically generates a transcript with timestamps, allowing you to easily pinpoint exact moments. This feature is particularly useful for creators who need to generate subtitles from video or for professionals tasked with compliance, where pinpoint accuracy is a requirement.
When Do Timestamps Matter?
Here's where timestamps really shine:
- Editing and Post-Production: If your goal is to create polished video content, timestamps make it easy to find and trim sections, ensuring your edits are both precise and time-efficient.
- Accessibility and Compliance: For those focused on creating subtitles or closed captions, timestamps are required to sync text with dialogue—enhancing accessibility for viewers who are deaf or hard of hearing.
- Quote and Highlight Extraction: Journalists and podcasters can swiftly locate key sound bites or quotes, facilitating smoother narrative crafting or episode highlight reels.
But when might you not need them? If you're simply transcribing video to share meeting notes or draft script documents where exact timing isn't critical, timestamps can be less of a priority.
Importing and Exporting
DeepScribe offers flexibility in exporting timestamped transcripts. Formats like SRT and VTT are ideal for captions and subtitles, maintaining synchronization between text and speech. For those in need of more traditional documentation, exporting as TXT provides a cleaner text file without timestamps cluttering your workflow, though it forfeits timing details.
Ultimately, whether or not you need timestamps comes down to the purpose of your transcription. When precision aligns with your goals, DeepScribe's automatic timestamping keeps your projects on track with minimal effort.
Export the Right Format (TXT vs SRT vs VTT vs DOCX/PDF)
Choosing the right export format for your transcripts is crucial for ensuring they meet your specific needs. Here’s a breakdown of the most common formats supported by DeepScribe and where each excels:
TXT (Plain Text)
- BLUF: Ideal for simplicity and maximum compatibility.
- Use Case: Best for quick edits or script referencing. This format is supported across all devices and software, making it the go-to for straightforward text needs.
- Limitations: Lacks formatting, timestamps, or any speaker identifiers, which might be necessary for detailed review or sharing.
SRT (SubRip Subtitle)
- BLUF: Perfect for synchronizing text with video or audio.
- Use Case: If you need to create subtitles for your videos, SRT files are your best bet. They’re widely used by video platforms and include timing information to display text in sync with audio.
- Limitations: SRT files can be a bit technical to tweak manually, as they contain both timestamps and text in a specific format.
VTT (Web Video Text Tracks)
- BLUF: An enhanced version of SRT with additional metadata.
- Use Case: Ideal for captions on web-based video players, VTT offers everything SRT does but with more flexibility, like styling options.
- Limitations: Not as universally adopted as SRT, but gaining popularity due to its enhanced capabilities.
DOCX (Microsoft Word)
- BLUF: For rich text editing and professional document presentation.
- Use Case: When you need to share transcripts as part of a report or require advanced editing features (e.g., track changes), DOCX is ideal.
- Limitations: Requires compatible software like Microsoft Word or Google Docs for access and editing.
PDF (Portable Document Format)
- BLUF: Best for secure and uneditable document distribution.
- Use Case: Use PDF when consistency and layout preservation are critical, useful for official documentation where editing should be limited.
- Limitations: PDFs are less flexible for editing text after export, but they ensure your file looks the same across all systems.
Here's a decision matrix to help you choose the right format:
| Goal/Need | Recommended Format | Reason |
|---|---|---|
| Quick text reference/editing | TXT | Simple, accessible, and universally supported |
| Adding subtitles to videos | SRT | Synchronizes text with video timestamps |
| Web-based video captions | VTT | Offers additional metadata and styling |
| Advanced text formatting | DOCX | Supports complex editing and presentation |
| Consistent, secure sharing | Preserves layout and prevents edits |
Remember, selecting the right format not only streamlines your workflow but also helps your team or audience interact with the content as needed. Whether you're creating subtitles or distributing a polished report, DeepScribe makes exporting your transcripts in the right format easy.
How to Export a Clean Transcript for Editing
When it comes to finalizing your transcript for editing, it's crucial to ensure it’s in the best possible shape for onward processing or sharing. Here’s how to get your transcript ready using DeepScribe and make the most of tools like Google Docs and Word for further editing.
Prepare Your Transcript
Before exporting, take a moment to review and tidy up your transcript. This involves:
- Check Speaker Labels: Ensure all speakers are correctly identified. DeepScribe automatically labels speakers, but a quick review helps catch any mislabels.
- Correct Jargon or Names: Some industry-specific terms or unique names might need manual correction. DeepScribe’s high accuracy handles most, but it’s always good to double-check.
- Fix Punctuation: Ensure sentences are correctly punctuated to enhance readability. This can often be done within the DeepScribe interface itself.
Pro Tip: Spend a few minutes re-reading your transcript. This small investment in time can make a significant difference in clarity and professionalism.
Exporting Options
Once your transcript looks good, you have several export options depending on your needs:
- TXT for plain text formats, ideal for simple editing or notetaking.
- DOCX or PDF for polished document delivery. These are available on the Pro plan and above.
- SRT/VTT for subtitles or captions, perfect for video integration.
To export, navigate to the export menu within DeepScribe, select your desired format, and download your file. This simple action helps integrate the transcript seamlessly into your next steps.
Editing with Google Docs or Word
After exporting, bring your transcript into a word processor for team editing and sharing:
- Google Docs: Simply upload the TXT or DOCX file to Google Drive. Google Docs allows collaborative editing, commenting, and sharing, which is fantastic for team workflows.
- Microsoft Word: Open the DOCX file in Word to take advantage of powerful editing features like track changes, which is especially useful for collaborative projects.
Create a Workflow for Team Handoffs
To facilitate smooth transitions between team members:
- Establish a Naming Convention: Consistency in naming files helps keep everyone organized.
- Share and Collaborate: Use Google Docs for live editing where multiple team members can make revisions simultaneously. This reduces back-and-forth email chains and keeps the document current.
- Regular Updates: Encourage team members to update the document status (e.g., “Draft,” “Reviewed,” “Final”) to keep everyone aligned on the progress.
By following these steps, you can efficiently produce an editable, clean transcript ready for any further editorial workflows. For more tips on refining your transcription process, check out DeepScribe’s blog for valuable insights and tools.
How to Turn Your Transcript into Captions/Subtitles
Turning your transcript into subtitles or captions is a straightforward process with DeepScribe. Let’s dive into how you can make your video content accessible and engaging with essential tips and tricks for using DeepScribe effectively.
Exporting to SRT/VTT for Caption Creation
The first step is to choose the right export format. DeepScribe allows you to export transcripts as SRT or VTT files, both of which are widely used for captions and subtitles. These formats support time synchronization, ensuring that your captions display in sync with the video. To export, simply navigate to the export section of DeepScribe after transcription and select the desired format. These files are text-based and contain both the dialogue and timestamps, making them ideal for most video platforms.
Adjusting Captions for Timing Accuracy
Timing is everything in caption creation. After exporting your SRT or VTT file, you may notice slight discrepancies in timing. Editing these files is essential to ensure seamless synchronization with your video. You can use simple text editors to adjust timings or employ dedicated subtitle-editing software for a more user-friendly interface. Pay attention to dialogue speed and adjust the display duration accordingly to maintain readability.
Caption Editing Tips Using DeepScribe
DeepScribe simplifies the editing process with intuitive features. Here are some tips to streamline your workflow:
Batch Edit: If you notice a recurring timing issue, batch editing can be a huge time-saver. Adjust multiple timestamps simultaneously for consistent synchronization.
Preview and Test: Always preview your captions with the video to catch any errors. Testing ensures that the timing aligns perfectly with on-screen dialogue.
Speaker Labels: Using DeepScribe’s speaker labeling feature helps clarify who’s speaking, which is especially important in dialogues or interviews.
Key Takeaway
Creating accurate subtitles enhances accessibility and viewer engagement. By exporting to SRT or VTT, fine-tuning timing, and leveraging DeepScribe’s editing features, you can efficiently convert your transcripts into high-quality captions.
By following these steps with DeepScribe, you optimize your video content for accessibility and broader audience reach. Explore more about creating subtitles and maximizing video accessibility on the DeepScribe Blog.
Accuracy Tips (So You Don’t Spend More Time Fixing Than You Saved)
To ensure your video transcription is accurate and requires minimal corrections, consider these essential tips that leverage DeepScribe's features and some general best practices.
Improving Audio Quality Before Transcription
Key Insight: Clearer audio leads to more accurate transcriptions.
- Eliminate Background Noise: Use tools to reduce ambient sounds. Consider recording in a quiet place and utilizing directional microphones to focus on voice input.
- Consistent Volume Levels: Ensure that speakers maintain consistent volume. This reduces the likelihood of missed words or phrases.
- Audio Format: DeepScribe supports formats like MP3, MP4, WAV, so use high-quality files to enhance transcription accuracy.
Correcting Jargon and Speaker Labels
Key Insight: Proper labeling and understanding of terms streamline the editing process.
- Custom Dictionaries: When dealing with industry-specific jargon or names, use DeepScribe's features to create custom dictionaries that enhance recognition accuracy.
- Accurate Speaker Labels: DeepScribe's automatic speaker labeling separates dialogue, reducing the need for manual correction. In multi-speaker environments, ensure speakers are clearly distinguished in the audio to simplify this process.
Utilizing AI to Enhance Accuracy
Key Insight: Advanced AI tools can significantly improve raw transcription quality.
- Whisper-powered transcription is a standout feature of DeepScribe, known for its high accuracy (up to 99%) and ability to handle diverse accents and technical jargon, providing a baseline that often requires minimal changes.
- Prioritize Features: Leverage AI-driven summaries and keyword extraction to identify critical sections of your transcript, ensuring focus on the parts that matter most.
Pro Tip: "Many users find that starting with high-quality recordings and minimal background noise are key steps in reducing transcription cleanup time."
By prioritizing these techniques, you not only enhance the transcription process but also minimize the post-editing workload, allowing you to focus on what matters—creating impactful content. For more on how DeepScribe can meet your specific needs, explore additional insights in the DeepScribe blog.
Free Plan Limits + How to Handle Long Videos
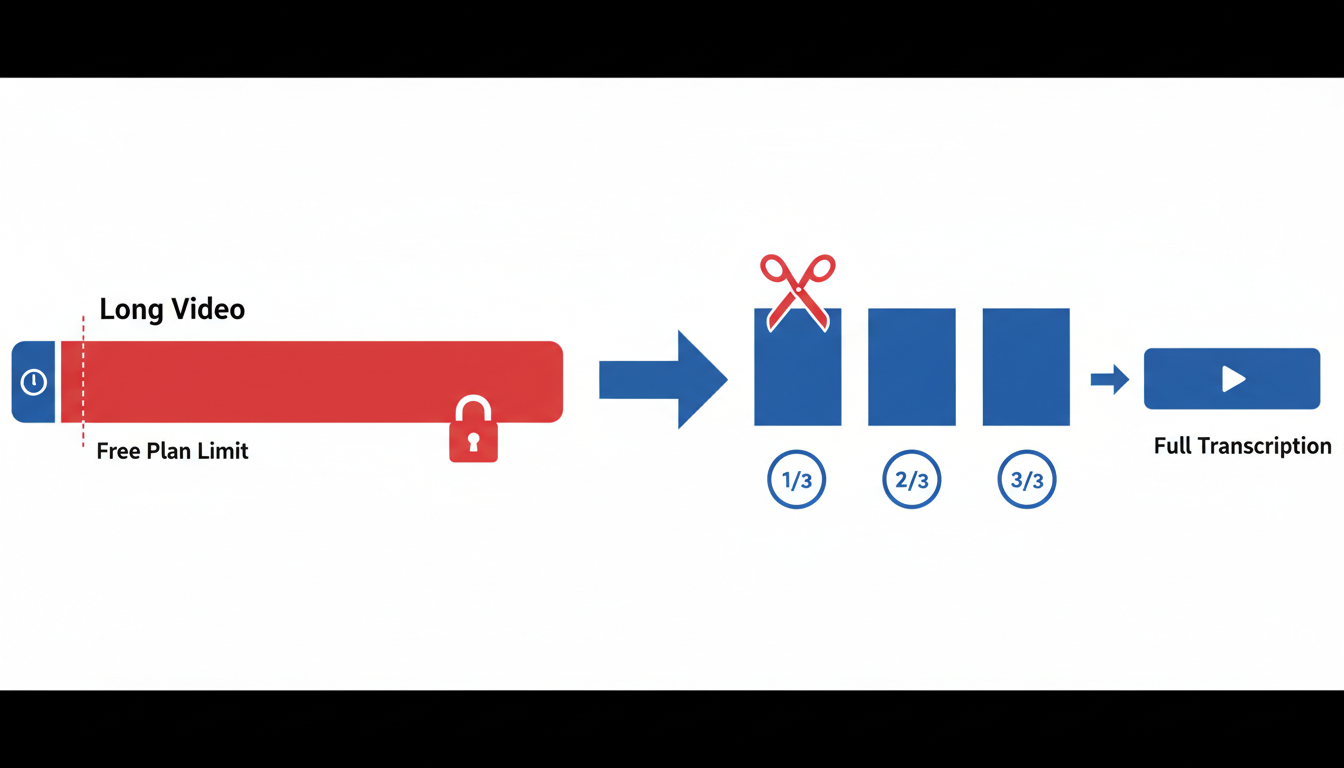
Navigating DeepScribe’s free plan effectively requires understanding a few key constraints: 30 minutes of transcription per month and a maximum file size of 25 MB. While these limits are ideal for short, occasional transcriptions, they can pose challenges for longer videos and larger files.
To begin, here’s how you can make the most of the 30-minute limit. If your video exceeds this duration, consider breaking it into smaller segments. Most video editing tools allow you to cut videos into parts seamlessly, enabling you to transcribe each segment within the monthly allowance. Alternatively, start with the most crucial part of the video—perhaps the segment where the main discussion or action takes place.
For the 25 MB file size cap, compressing video files without significant quality loss is a practical solution. Tools like HandBrake or online compressors can reduce file size, keeping it below the threshold. Be sure to check the output for quality to ensure the audio remains clear, as this influences transcription accuracy.
Expert Tip: If compression or segmenting feels cumbersome, keep in mind that upgrading might be more efficient for heavier usage.
DeepScribe’s Basic plan offers 300 minutes a month with a 500 MB file size limit, while the Pro plan provides even more flexibility with 900 minutes and file sizes up to 2 GB. These upgrades are particularly useful if you're routinely handling longer content or higher file volumes.
The free plan provides a solid entry point for initial exploration, especially if your needs are occasional and lightweight. However, if you find the constraints consistently limit your workflow, it may be time to explore these paid tiers. They offer added minutes, larger file capacity, and access to more advanced features like multi-format exports and multilingual support.
By strategically managing your uploads and knowing when to consider expanding your plan, you can optimize the workflow without unnecessary interruptions.
Privacy/Security Basics When Uploading Video
When using an online video transcription tool like DeepScribe, it's crucial to ensure your data remains secure. Here's what you need to know about the privacy and security measures in place:
End-to-End Encryption
End-to-end encryption is a key component of DeepScribe’s security strategy. This means that your video files are encrypted from the moment they leave your device and remain so until they reach DeepScribe’s servers. This encryption ensures that only authorized users can access the information, protecting your content from unauthorized viewing during transmission. Such a protocol is vital for safeguarding sensitive material, whether you're dealing with confidential interviews or proprietary corporate meetings.
Data Deletion Policies
Understanding data deletion policies is essential for anyone concerned about privacy. DeepScribe automatically deletes video files after processing. This means once your transcription is complete, the original files are removed from their servers, reducing the risk of unwanted data exposure. This process mitigates potential security vulnerabilities and provides peace of mind that your content isn’t stored longer than necessary.
SOC 2 Type II Compliance
DeepScribe assures users of data security through its SOC 2 Type II compliance. This standard involves rigorous third-party audits to evaluate how a company protects customer data. Achieving SOC 2 Type II compliance demonstrates that DeepScribe employs industry-best practices in privacy and data security, providing a higher level of trust for users who handle sensitive or confidential recordings.
With these robust privacy measures, DeepScribe not only meets but exceeds traditional security expectations. So, whether you're transcribing media content, legal testimonies, or multilingual meetings, you can be confident that your information is both private and secure. For more insightful details on this topic, explore the DeepScribe Blog for further guidance on transcription technology and privacy.
Common Problems & Fixes (Troubleshooting)
Navigating free transcription tools can be tricky, but with a few expert tips, you can overcome common obstacles. Here’s how you can tackle challenges like file size issues, managing speaker labels, and working with various file formats using DeepScribe.
Resolving File Size Issues
For many free transcription services, file size limits can be a stumbling block. With DeepScribe’s Free plan, you're capped at 25 MB, which is typically enough for shorter videos but might limit longer or higher-quality media. If your file exceeds this, try compressing the video. Many free video compressors online can reduce file size without significant quality loss. Should compression still not work, consider breaking the video into smaller segments, each under 25 MB. This approach allows you to transcribe in parts and assemble the transcript as a whole later.
Managing Speaker Labeling and Punctuation
DeepScribe’s AI-powered tool excels in automatically identifying and labeling speakers, an invaluable feature when transcribing meetings or multi-person videos. However, accuracy can sometimes falter if voices overlap or there’s background noise. Ensure your audio is as clear as possible before uploading. For extra clarity, run a quick manual review post-transcription, adjusting speaker labels and punctuation as needed. This quick check ensures you maintain a clear, professional transcript.
Working with Different File Formats
Understanding which export format suits your needs can streamline your workflow. DeepScribe offers export options like TXT and SRT (for the Basic plan and above), enabling flexibility depending on your end goals. For simple text needs, TXT is your go-to. If you're aiming to create subtitles, the SRT format is more suitable as it includes timestamps vital for syncing accurately with video content. Should you need a document-ready format, the Pro plan offers DOCX and PDF exports.
Pro Tip: When choosing export formats, align them with your final use case. Need subtitles? Opt for SRT. Documentation? Go for DOCX or PDF if available.
By tackling these common hurdles and leveraging DeepScribe effectively, you can ensure smooth and efficient transcription workflows—saving time and reducing headaches.
FAQ
What is the best file format to export my transcript?
The best format depends on your goals:
- TXT: Ideal for basic text extraction or quick edits. It's simple and universally readable but lacks formatting for structured documents.
- SRT/VTT: Use these for captions or subtitles. They include timestamps, which are essential for syncing with videos. Perfect for YouTube or any platform that supports subtitle uploads.
- DOCX/PDF: Choose these for polished, formatted documents. They’re great for scripts, show notes, or sharing with clients/teams. Note that these are available in Pro/Business plans.
With DeepScribe, you can tailor your export to fit your needs using the decision matrix.
How accurate are the transcriptions?
DeepScribe offers industry-leading accuracy powered by Whisper, with 99% accuracy claims. This high level of precision handles accents, background noise, and jargon effectively, ensuring reliable transcripts for professional use.
How do I add timestamps to a transcript?
When exporting as SRT or VTT, timestamps are automatically included. They’re crucial if you’re creating captions or breaking a video into clips. For tasks like editing or compliance, timestamps make locating specific sections a breeze.
What are the limitations of the DeepScribe Free plan?
The Free plan offers 30 minutes of transcription per month and a maximum file size of 25 MB. It allows basic TXT exports without a credit card requirement, making it a great option for solo creators starting out. However, for extended usage or larger files, consider upgrading to Basic or Pro.
Can I transcribe videos longer than the free plan allows?
If your videos exceed DeepScribe’s Free plan limits, consider splitting them into smaller segments or using the Basic plan, which supports files up to 500 MB and 300 minutes/month. This increases your processing opportunities without breaking the bank.
How secure is my data with DeepScribe?
Your data is protected with end-to-end encryption and is automatically deleted after processing, ensuring privacy. The platform follows SOC 2 Type II compliance, providing peace of mind for handling sensitive content.
Frequently Asked Questions
What file types does DeepScribe support?
DeepScribe supports formats like MP3, MP4, WAV, WEBM, and more.
Can I use DeepScribe for free?
Yes, with the free plan you get 30 minutes of transcription per month with files up to 25 MB.
How do I choose the right export format for my needs?
Use the decision matrix to select between formats like TXT, SRT, VTT, DOCX, and PDF based on your goals.
How secure is my data with DeepScribe?
DeepScribe uses end-to-end encryption and automatically deletes files after processing.
What are typical uses for timestamps in transcripts?
Timestamps help with editing, compliance, and accessibility for video content.
Conclusion
Transcribing videos for free using DeepScribe is a straightforward process, offering a smooth journey from upload to export-ready text. Here's a quick checklist to help you choose your next steps:
- Need text for notes/scripts? → Export as TXT (or DOCX/PDF for paid plans).
- Need subtitles? → Export as SRT/VTT (plan-dependent).
- Need meeting-style notes/action items? → Explore the meeting workflows.
For a seamless start, try the DeepScribe upload flow and export the file type that matches your goal. Whether you need text, subtitles, or meeting insights, it’s all just a few clicks away.
Written by

DeepScribe Team
Content Team
The DeepScribe content team shares insights on audio transcription and AI technology.